
How to Add Fingerprint Access to Xeno Digital Lock | Step-by-Step Guide
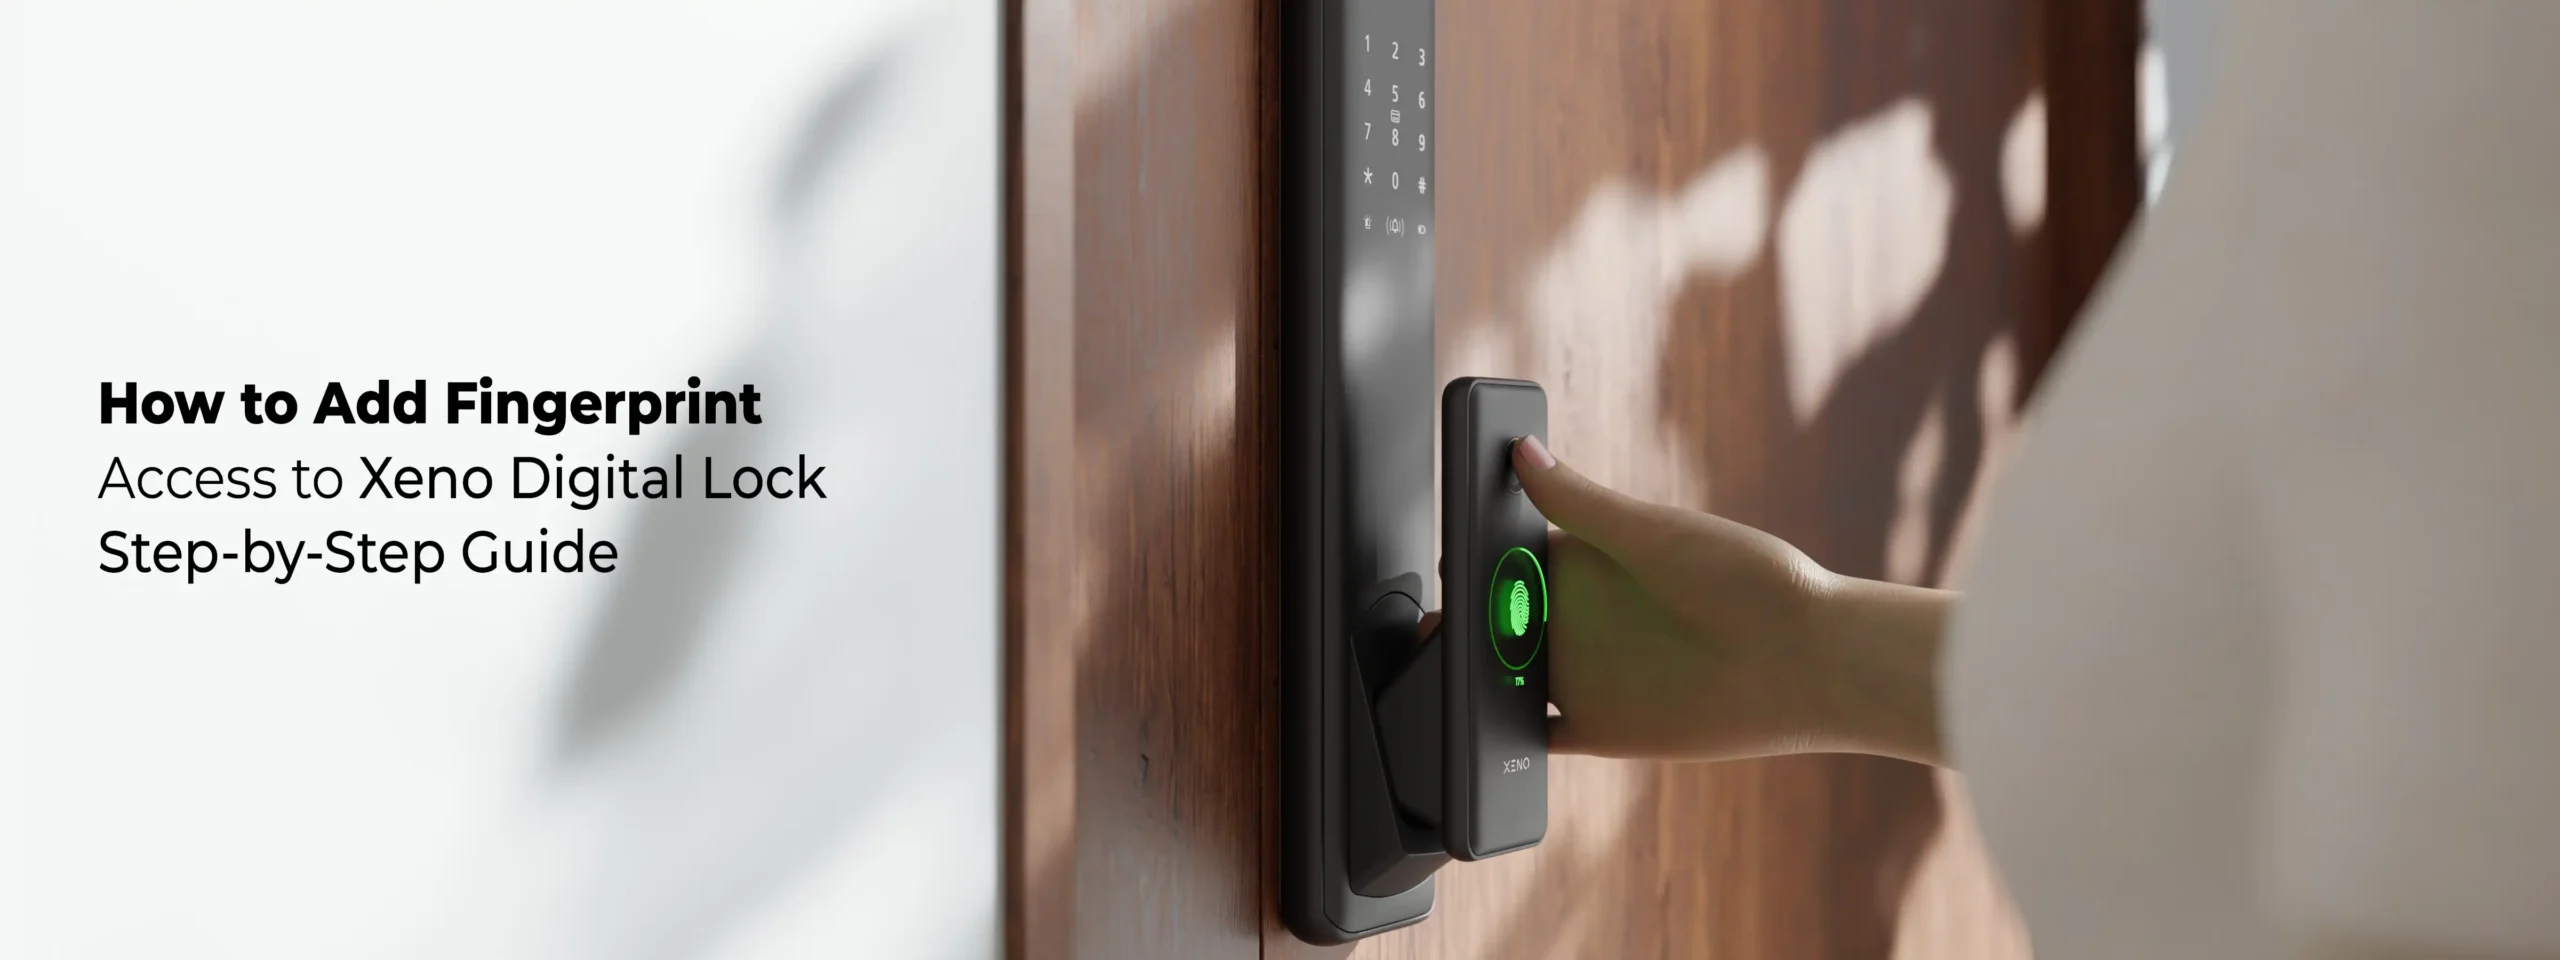
With digital security becoming the norm in modern homes, fingerprint access provides both convenience and enhanced safety. If you’re using a Xeno Digital Lock, setting up fingerprint access is simple with the Smart Life or Tuya app. This guide walks you through each step to register a new fingerprint for yourself or any authorized user.
Add Fingerprint Access to Your Xeno Digital Lock in Just a Few Steps
Step 1: Launch the Xeno Smart Mobile App
Start by opening the Smart Life mobile app on your smartphone. Ensure your lock is already paired with the app and that Bluetooth or Wi-Fi connectivity is enabled.
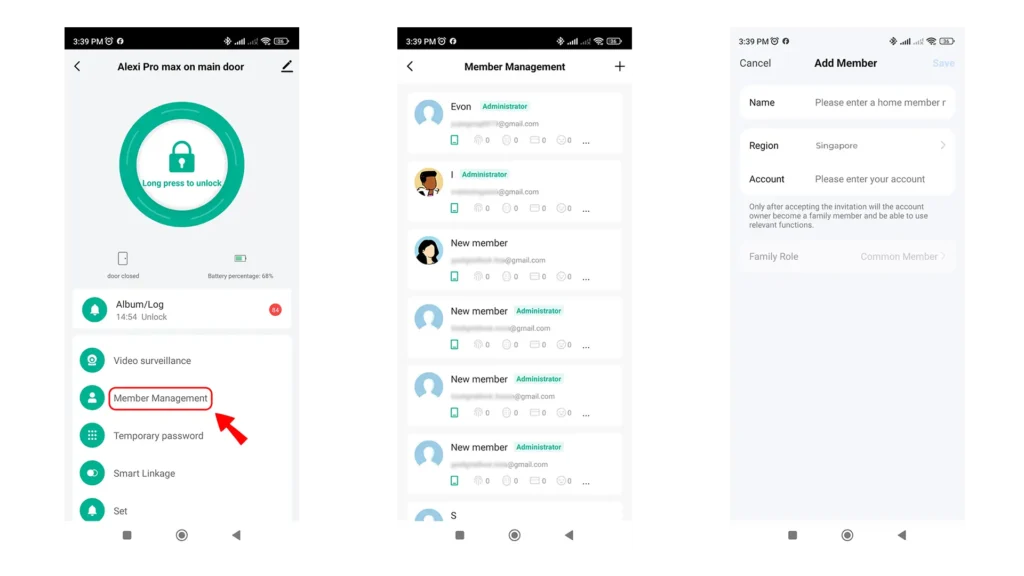
Step 2: Navigate to “Member Management”
Once you’re on the home screen of the app:
- Tap on the “Member Management” tab.
- Here, you’ll see a list of users who currently have access to your digital lock.
This section allows you to add, manage, or remove users and assign different access permissions like fingerprints, PIN codes, or app-based access.
Step 3: Select or Add a New Member
If the user you want to grant access to is already listed:
- Simply tap their name and proceed to assign a new fingerprint.
If you’re adding someone new:
- Tap “Add Member”.
- Enter their name or identifier.
- Choose “Fingerprint” as the access method.
Step 4: Register the Fingerprint
Now, it’s time to scan the fingerprint directly on the lock.
- Stand near the lock and wake it up by touching the screen or fingerprint sensor area.
- Follow the on-screen or in-app prompts and place the user’s finger on the fingerprint sensor.
- The system will prompt you to scan the same finger multiple times to ensure accuracy.
- Once registration is complete, the fingerprint will be securely stored in the lock’s memory.
Note: For best results, use a clean, dry finger and press firmly on the sensor.
Step 5: Label the Fingerprint for Easy Identification
After the fingerprint is successfully registered:
- Assign a label or name to the fingerprint (e.g., “Dad”, “Cleaner”, “Child”, etc.)
- This helps you easily manage access in the future, especially when you need to remove or update specific users.
Step 6: Confirm & Save
Once you’ve completed the fingerprint setup:
- Review the access permissions assigned.
- Tap “Save” or “Confirm” in the app.
- Test the fingerprint on the lock to ensure everything is functioning as expected.
And you’re done!
What You’ll Need:
– Your smartphone with the Smart Life or Tuya Smart app installed
– An active internet or Bluetooth connection (depending on your lock model)
– Physical access to your Xeno digital lock
– Administrator access on the app
Fingerprint Access Made Easy
Adding fingerprint access to your Xeno Digital Lock is not only a smart security choice — it’s incredibly user-friendly when done through the Xeno Smart Mobile App. With a few simple steps, you can grant or revoke access anytime, ensuring peace of mind for you and your loved ones.
If you haven’t explored all of your Xeno lock’s features yet, stay tuned for more guides on using RFID, mobile unlock, PIN codes, and real-time access logs.